Snapshotting
Introduction To Git Snapshots
We learned earlier that Git uses the snapshot method which will capture the situation and conditions of the repository when we save changes using Git commands.
With the snapshot method, Git will only save changes that occur in both files and folders into snapshot at that time. Meanwhile, files and folders that have not changed will be saved as references to the previous snapshot.
Let’s learn together how a Git snapshot is created:
Note: Before running the Git command below, make sure it is in the Git repository, if not, then use the
git initcommand first.
File stages in Git
Working, staging and commit (Source: axosoft.com)
The files in a Git repository will exist in three different stages:
- Not staged: The folder we are working on now is called the working directory. When we create or change a file in the working directory, the file is not staged. When we work on a task, there will be files that we change or that we leave as is. Now for the file that we changed, to save it into Git, we need to move it to the staging area.
- Staged: The staged process will select which file we want to ‘commit’ later. When the files have been collected, we can save them and move them to the committed stage with the
git commitcommand. - Committed: The series of
commitsbecomes the history of our project from start to finish, eachcommitcan be seen in thegit logand with it we can see the entire history of our project from the start of our git repository.
Commands to check current repository status and history
The Git commands that are very useful for viewing the status of the repository that we are working on and often use are:
git status: displays the state of the working directory and staging area so we can see which files are not staged and which are staged. More details heregit log: displays committed commits. More details here
To see Git Snapshot in practice, watch the following video:

Add
Git add visualization (Source: img-bc.icode.best)
The git add command functions to add new files or changed files in the working directory to the staging area
How to Use git add
Common usage and options for git add
git add <file>: Adds the specified fileshell > git add file1.txtgit add .: Adds all filesshell > git add .
We can see the other git add options with tldr git add or git add -h
The safest way to use git add is to designate a specific file or directory that we want to add to the staging area. Example:
git add login/: Adds all changes to files inside folder logingit add README.md: Adds all changes to the README.md file
git add All Files
If we want to add to the staging area all files, there are several commands that can be used, namely:
| Command | New Files | Modified Files | Deleted Files | Description |
|---|---|---|---|---|
| git add . | ✔️ | ✔️ | ✔️ | Adds all files recursively in the current folder |
| git add -u | ❌ | ✔️ | ✔️ | Adds all files that have previously been tracked in Git. |
Source: stackoverflow.com
Saving all files to the staging area has several risks, namely:
- Creating a
committhat is too large may contain changes that have nothing to do with what is being done. - There may be files containing sensitive information that we accidentally
committedsuch as password, token, etc.
We can prevent the possibility of the 2 points above by ensuring that each commit only contains related changes and match the description of its commit.
Undo Added Files
For example, we have files hello.txt and world.txt in repository and we have added both to the staging area
> git status
On branch main

No commits yet

Changes to be committed:
   (use "git rm --cached <file>..." to unstage)
         new file: hello.txt
         new file: world.txt
Then we do the git reset command on file hello.txt to return it to working directory
> git reset hello.txt
> git status
On branch main

No commits yet

Changes to be committed:
   (use "git rm --cached <file>..." to unstage)
         new file: world.txt

Untracked files:
   (use "git add <file>..." to include in what will be committed)
         hello.txt
So we can see that the file hello.txt has moved to the working directory. If we do git commit, only world.txt will be committed. In this way, we can ensure that the files that are committed are only the files that we want.
Commit
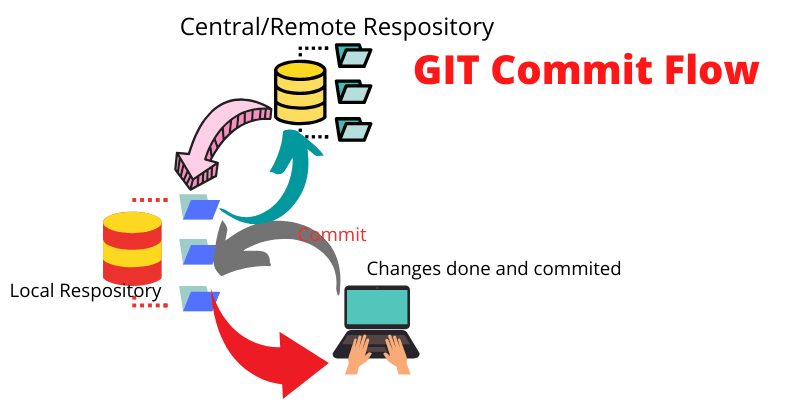
Git Commit Flow (Source: cspsprotocol.com)
How to use git commit
The git commit command functions to save and move files in the staging area to the committed stage.
When saving we are required to provide a commit message which contains a record of the changes that occurred in the file or collection of files that we committed.
Commit Message Best Practice
Commit message must be short and describe the changes made. Why should so? Because when looking at the history of the project, we will be guided by the commit message, so that the commit message ideally tells a story from the beginning of the history of our project to the end.
The Commit message must be in present tense and explain clearly & concisely the changes made. We can also add semantic commit message so that each commit message has its own category (feat: feature, fix: fix, docs: addition of document) as in the following example :
git commit -m "feat: create file structure for Git guides"git commit -m "fix: translate Git cheat sheet into German"git commit -m "docs: update broken URL to Git resources"
By ensuring our commit message can be read easily, we’ll be able to rollback (restore the status of our project) to any commit.
Checkout
The git checkout command is a command that is often used, one of which is to move between commits so that we can review the contents of a particular commit.
Let’s say we have a repository that has several commits and we do a checkout to one of the commits.
With the command git log --oneline it will display commit per line and have a short output in the form of the first seven characters of the commit id (example: 7ba2a60) and commit message. Use the commit id to switch commit:

> git log --oneline
c21091a6 (HEAD -> master) docs: add note to snapshot and git add
e2eea3ae docs: add ideation
> git checkout e2eea3ae
> git log --oneline
d82c536 (HEAD) docs: add ideation
So it can be seen that by doing checkout we can move to commit with id d82c536. If we want to get back to work after seeing the contents of this commit, we can run the command: git checkout -
> git checkout -
> git log --oneline
7ba2a60 (HEAD -> master) docs: add note to snapshot and git add
d82c536 docs: add ideation
So, it can be seen that commit has moved to the previous position.
How To Undo A Commit With git revert
git revert is the highly recommended and safest way to undo a commit.
> git log --oneline
47d87b4 (HEAD -> master) docs: minor typo fix
c21091a docs: add note to snapshot and git add
e2eea3a docs: add ideation
For example, if we want to undo commit “docs: add note to snapshot and git add”, we can do the following command:
> git revert c21091agit revert will create a new commit whose contents are the opposite (inverse) of the commit we want to undo. If we call git log again:
> git log --oneline
562560e (HEAD -> master) Revert "docs: add note to snapshot and git add"
47d87b4 docs: minor typo fix
c21091a docs: add note to snapshot and git add
e2eea3a docs: add ideation
Then git revert will become a new commit which will undo all the changes we have made previously:
- If we have added files,
git revertwill remove them - If we make changes to a file the changes will be cancelled
- If we delete a file,
git revertwill add it back.

Git revert (Source: cloudinary.com)
Updating Commits With Git Commit Amend
For example, we have done a commit and we realize that there was an error in the commit (whether we forgot to edit a few lines of the file or gave the wrong commit message) we can do git commit --amend, where the entire file is staging will now be put in the previous commit.
Warning: do not do
git commit --amendif the previous commit has already beenpush
git rm
There are 2 ways to use git rm:
- Used to delete files from the staging area and working directory
- Used to cancel (delete) file from staging area back to working directory. You could say this is the opposite of the
git addcommand.
Here we will focus on the second use, namely canceling the file from the staging area back to the working directory. For that we will use git rm --cached.
How to use git rm for staged files
We use the git rm --cached command to move a file from staging to working directory. For example, we have a file named hello.txt which is already in the staging area.
[user@localhost]$ git status
On branchmaster
No commits yet
Changes to be committed:
   (use "git rm --cached <file>..." to unstage)
         new file: hello.txt
So we can move file hello.txt from staging area to working directory without deleting it from file system by:
[user@localhost]$ git rm hello.txt --cached
rm 'hello.txt'
[user@localhost]$ git status
On branch main
No commits yet
Untracked files:
   (use "git add <file>..." to include in what will be committed)
         hello.txt
nothing added to commit but untracked files present (use "git add" to track)
So it can be seen that the file hello.txt is no longer in the staging area but has moved to the working directory.
Note: Remember to use the
--cachedoption. Without the--cachedoption, the file will be deleted from the staging area and working directory.
git diff
What is git diff?
git diff is used to inspect changes we make when working on a Git repository. The way it works is to compare the file in the working directory with the file in the commit in the repository.
Examples
We add a file in the initialized repository to try git diff
> touch diff_test.txt
> echo "this is a git diff test example" > diff_test.txt
> git add diff_test.txt
> git commit -am "add diff test file"
[main (root-commit) 6f77fc3] add diff test file
1 file changed, 1 insertion(+)
create mode 100644 diff_test.txt
For example, now we change all the contents of the file diff_test.txt.
> echo "this is a diff example" > diff_test.txtBy executing git diff, we will compare the changes just committed (changing the contents of file diff_test.txt) with the previous commit, which will produce the following output:
> git diff
diff --git a/diff_test.txt b/diff_test.txt
index 6b0c6cf..b37e70a 100644
--- a/diff_test.txt
+++ b/diff_test.txt
@@ -1 +1 @@
-this is a git diff test example
+this is a different example
The following is an explanation of the output above:
Comparison input
diff --git a/diff_test.txt b/diff_test.txta/diff_test.txtis the file in the commit that we are comparing with the file in the working directory, which is written here asb/diff_test.txt.Markers for changes
--- a/diff_test.txt
+++ b/diff_test.txt
These lines are the symbols assigned to each input source. Changes from
a/diff_test.txtare marked with the symbol---and changes fromb/diff_test.txtare marked with the symbol+++.Diff content
-this is a git diff test example +this is a different example- The
-sign indicates that this line is deleted and does not exist in the file currently in the working directory. - The
+sign indicates that this line was added in the current file and is not present in the file we committed to the repository.
If the
-sign and the+sign are close together, this usually indicates that a replacement has occurred in that line. In the example above, the linethis is a git diff test exampleis replaced withthis is a diff example. And that’s what we do in this example.- The